
 LinkBack URL
 About LinkBacks
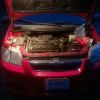 The red Skittle
Hey all! I have creeped this form for years and finally got a chance to show something.
Ok, so I knew I had a bad cat due to multiple different reasons:
1. cel has been coming on for over a year for catalyst low function
2. That catalytic converter smell every once in a while.
3. Also using obd2 reader and torque, I could see my o2 temp hitting 1600 to 1700 degrees f.
4. Heavy fuel in the exhaust smell when starting up from cold, or sometimes when warm.
5. Worse gas mileage than before. Not by much in my case, but if you have a fully clogged cat then obviously it'll bog down and barely move.
Also I pulled the upstream o2 sensor (above converter, in the exhaust manifold) anndd.. damn:
And so what do you need to get?
#1. If you don't have an angle grinder but have a decent Dremel (not the cheapest battery operated kind), buy the Chuck and metal cutting wheels for it ($14 at Lowe's). You will need it for any bolts that will inevitably won't come loose and will strip. I had two of these.
Look for this pack (because the chuck by itself is $15? I have no idea why):
#2. A can of pb blaster. Before even thinking about starting on this project if you have a slowly turning inefficient cat like I did AND your bolts don't look hopeless, get this and a week before your ready to put the new cat on, do this once a day. As the cat gets cool enough not to ignite any flammable fluid(about 30ish minutes for me), get out your hammer and beat on the flange housing on the cat on the top and bottom a bit, being careful not to hit the bolts or other housings, then spray with the PB blaster, then beat it a little more.
#3. A catalytic converter; this is the one I bought:
https://rover.ebay.com/rover/0/0/0?m...2F112672297341
I paid $79 and free shipping. It came fast, and the bolts and nuts it came with weren't terrible. Many other cheap cats I have read through had tons of comments on the bolts and nuts being so cheap that they bound up when they were trying to thread the nuts and they broke.. Side note. This cat isn't California bound. If you live in Cali, you may have to dish out much more for a bigger more OEM like cat..
#4. Crush ring seals which you will probably have to order. You DO need two of them. It was confusing, even looking at exploded parts images on gmpartsdirect, but this is my setup and it works. https://www.autozone.com/emission-co...10_804100_6064 $7/piece.
#5. A hammer, socket set, and ratchet set. I had shallow sockets and got through it. It would have been a smidge nicer to have deep sockets, but either way is fine.
#6. An o2 sensor socket. OR if you have a deep socket that fits the o2 sensor that you don't care about anymore, use one of the cutting wheels to cut a slit up the side of the socket. I wouldn't purchase one of those side mount sockets, or the socket premade onto the wratchet handle. No point, more expensive, and just takes up room. I opted to buy the socket which was from Autozone but you can't find it on their website for some reason, but it looks like this:
If possible or available, get a breaker bar. If not, use a pipe short enough to get under the car, but long enough to give you some leverage for the ratchet.
OK, so to start, your going to need to take off the exhaust manifold heat shield. Cant remember the bolt sizes but if I can I'll check it and update tomorrow. I think you need a 13mm socket for the bolts on the converter itself.. Maybe the same for the shield. Also you will need a decent sized extension (or in my case, multiple extensions) to get the back bolt on top of the cat, behind the exhaust manifold.
Once it's cooled down enough to work on, just try to break the bolts loose on top. Took some umph but I got them without shearing them.
Once you have the top bolts broken loose, dont remove them yet. Start trying on the bottom ones. If you can break them loose without shearing the bolts then cheers, your ready to go. For 99% of everyone else however.. Continue the next step.
Once/If you shear the bolt, don't fret. That's where the cutting wheels and dremel tool come in. In my experience it took 3 of the metal cutting wheels for one bolt (there were complications and I'll tell why in a moment), and I wont say how many of the crappy cutting wheels I went through for one of the bolts (that after I used them all finally broke loose without cutting it completely off).
This is why I say if you have a dremel go get that bit and good metal specific cutting wheels. I got tired of messing with it stripping the edges and decided to just cut on it with all my crappy cutting wheels. Dremel says these are basically all purpose cutting wheels (the crappy ones) including metal, but they just wont 'cut' it..
When you cut the bolts/nut off, start as close as you can to the flange, and take your time. have a sturdy hand so it wont wobble on you, and don't apply too much pressure. If possible, make sure the car is parked where you have enough clearance underneath to have the cutting wheel as horizontal as possible. I had to find a dip in the yard and strategically park my car where it would give me clearance for the dremel to do so. If you feel it start binding, back off and start in another area of the bolt. Try to first cut as much of the nut itself down where it meets the flange without cutting into the bolt at least on one side. Then spray it down with PB blaster, give it a few taps with the hammer and try to break it loose again. It may come loose for you at this point. If not, then keep cutting. You may not be able to cut it completely through with the wheels. That's where the hammer comes in.
Once you have the bolt/nut cut 3/4 of the way on all sides, start beating the hell out of it with a hammer, and it should break off.
Now rinse and repeat until you have broken all bolts loose.
One last order of business... On my sedan, there was a bracket that was holding the bottom of the cat on the farthest most bolt from the front of the car.. This was a pain in the butt to get loose, and your only option is to at least loosen the bolt holding it to the engine so you can get the cat out from the bottom. I had to use a metal pipe along with my rachet wrench to get it to loosen. I had all the nuts off the cat at this point, and you may do better doing it that way than to try to break the bolt for the bracket first. Your choice.
Once you have all the bolts loosened/broken/grinded/broken off or cut off, go ahead and remove all 6 bolts.
Now just remove or loosen the bracket holding the bottom of the cat to the front of the engine and it should drop right down. If not, beat the cat with a hammer until it does.
A side note. I opted to just bolt the new cat back in without using the bottom bracket holding it to the engine. This way I wouldn't have to worry about the new bolts binding or taking off the exhaust manifold or fiddling with taking the bracket all the way off and then holding it up and screwing it back in. As of this writing, I just moved the bracket to the side so it's clear of the cat.
When installing the new cat, don't forget the metal crush ring seals. you can press them into the cat indention for it with your fingers and it should hold good enough to not fall out easily.
Make sure you look at the new cat and BOTH bolt patterns. The top of the cat flange has obtuse bolt distances (IE, one bolt hole is further away from the other two holes, and the bottom of the cat has equidistant, or rather same distances from each of the three bolt holes). Once you understand that, it's not easy to mess up. Just make sure facing the front of the car that the top of the cat's furthest bolt hole is facing the right of the car and your good to start putting it in. Also a side note, it's a lot easier to put the bolt into the cat flange before putting it in the car. I can't remember which one, but youll notice if you find it before you put it in that you have to kind of put it in at a certain angle. I installed the cat from the bottom of the car, holding it up with one hand while getting the bolt into the exhaust manifold flange and threading the nut on top as best I could to hold it so I wouldn't have to hold it up anymore.
Once you have all the bolts threaded with the nuts, snug them down a little one by one in any pattern you want just make sure you do it a little at the time so the crush ring curshes evenly and makes a good solid contact surface so it won't leak exhaust fumes. After that, screw the o2 sensor back in, put the exhaust manifold heat shield back on and your done!!!
The results? Here ya go!
Here is the results from Torque and my OBD2 reader after a fairly short but really hard drive in the car. The proof is there. Remember that with the old cat, the temp was hitting 1700 to high 1800 degree range. Strangely enough the old cat didn't visibly look bad? You could see through the honey comb and there was nothing rattling inside. It was definitely bad however.
This is the first time I have done a catalytic converter myself, and it was a HUGE pain in the butt, but hopefully these instructions with required tools will save some of you guys the two to three days of hammering, yelling, screaming, and hustling under your favorite Aveo like I did. Knowing this now, it would probably take me about 3 hours max now. If you have a shop or a good assortment of shop tools then obviously you could do this much faster and easier. If you have a legit angle grinder, then these bolts will be a cake walk.. Heck it may just be more worth your time to just cut them all off on the bottom to save time. I know there are a ton of threads on here for cats but nothing too in depth or just for specific parts of it so I decided to upload all I could.
Any questions just ask and if I was vague at all or if it was too jumbled in my instructions just let me know.
Have a great day!


 Reply With Quote
 "Pre-Aveo"
 Chevrolet's Aveo RS Concept
 . I'm thinking about getting this thing to the point of hitting 300,000 and look good doing it, but currently the horrible clearcoat is shedding on this car like someone with a sunburn. It should start happening in about two to three weeks, and I'll post a full play by play thread.
 My Aveo