
 LinkBack URL
 About LinkBacks

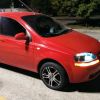 Joe's Aveo
You will need LED T5/74/73 bulbs for this. These are just diagrams, and you don't necessarily have to unhook the electrical connectors to do the replacement or the battery. Some do feel safer disconnecting the battery but the LEDs are usually one directional so you wouldn't know until you hooked the battery back up to tell if they were twisted in the right direction. I will post pictures of a walk-through soon when I get the time to do it myself and once my bulbs arrive.
REMOVAL PROCEDURE
- Disconnect the negative battery cable.
- Remove the two black side panels that have dimples on them by using a flathead covered in tape to prevent damage to the plastic, by starting to wedge from the bottom to the top and pry it off gently until it comes off..
- Remove the Instrument panel lower cover.
- Remove the HVAC controller retaining screws.
- Remove the controller by pulling it out to provide clearance for the removal of the cable.
IMPORTANT: Note the location of the cables and the housings to facilitate their reinstallation.
5. Disconnect the mechanical control cables by gently prying off the cable eyelet and unsnapping the cable housing from the mechanical slide.
(I couldn't get the cables undone so I removed the housings that each of the cables were attached to, but if you can get the led's out without removing the black housings, by all means do so and save yourself the trouble! haha It took forever to get all of it reinstalled, I will still provide pictures though)


 Reply With Quote
 2008 Chevrolet Aveo
 2010 Honda Accord EX-L V6